STREAM Online Help > Getting Started
This section describes how to launch the demo and gives a basic overview of the user interface.
The Web-based demo requires Java Web Start in order to run on the client machine. If you are using Java 1.4.1 or later, then Web Start is already installed on your machine, and you may skip this section.
If you have a pre 1.4.1 version of Java, you will need to download and install Java Web Start from Sun's web site. Java Web Start is part of J2SE 1.4.2 and is available here. From the many options listed here, the easiest and fastest one is to install the JRE for J2SE v 1.4.2_04.
For users of Netscape or Mozilla web browsers,
the Java Web Start executable might have to be manually registered as the
handler application for JNLP files.
Please set up the Java Web Start MIME
type JNLP in the Edit->Preferences->Navigator->
Helper Applications section. For example:
New Type... button and fill the fields:
File extension: jnlpMime type: application/x-java-jnlp-fileApplication to use: The javaws executable in your Java Web Start software directory must be specified here
Visit the demo web site at http://skate.stanford.edu:8080. Follow the instructions to start up a server and launch a client. If Java Web Start does not launch after you click on the "Launch Server" button, please check that you installed Java Web Start correctly in the previous step.
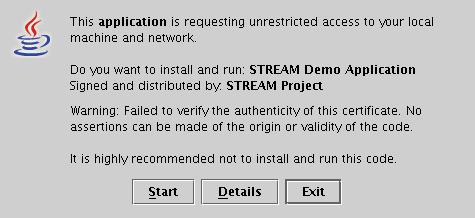
Note: Upon starting the demo for the first time you will receive the following security warning:
Select the "Start" option to dismiss the message. The demo needs to access your local machine in order to save a few files into your home directory. All files used by the client will be stored in the .stream subdirectory in your home directory, which you can delete after you have finished using the demo.
After launching the client, the following screen will come up:
The demo should already be configured to connect to the server, so all you need to do is click the "OK" button. If you are behind a firewall, you should check the "Check here if you are ..." box.
There are a number of components in the query execution plans in our system: operators implement relational operations such as joins and projections, queues hold tuples between operators, and synopses materialize collections of tuples. Each of these is a subclass of a generic Entity class. Each plan entity has a table of attribute-values pairs called its Control Table (CT for short), and it exports an interface to query and update its CT. The complete plan entity list has more information on individual entities.
The main display window can provide a visualization of the entities comprising a query plan currently in the system and their control tables.
When the client connects, the following screen will be displayed (but with empty panes when you start with no queries registered):
It is divided into 3 panes. The Plan Display pane displays a graphical representation of the currently selected query plan. The output operator is shown at the top, and the stream inputs are shown at the bottom of the query plan. You can use the mouse to move objects around in the layout, and using the Shift key moves the entire subtree. You can switch the visualized plan by selecting a different plan from the "View" menu.
The Plan Entity Details pane shows all properties in a selected entity's control table. The unique entity ID is displayed at the top. Click on any entity in the Plan Display pane to bring its properties into the entity details pane.
The Legend pane shows all of the icons that appear in the Plan Display pane and the entity types that they correspond to. It also gives a brief decription of each.
The File menu contains commands to register streams and relations, register CQL queries, create CQL views, and drop queries and views. These commands will be explained in detail in later sections.
The View menu contains an entry for each query and view. Selecting one brings the corresponding plan into the Plan Display pane. (You can also view the full CQL text of the current plan by right clicking on an unoccupied space in the Plan Display pane and selecting the "Show Query" option.) Selecting "Show Catalog" will bring up a list of all registered streams and relations and their schemas.
The Script menu provides a means of executing predefined sets of (batch) commands. You can execute a script by selecting it from this menu.
The Stream Source menu provides an easy way of sending tuples for a predefined stream into the STREAM system. (New stream sources can also be created as will be described later.) Selecting a source from the menu will bring up a control that allows you to start and adjust the rate at which tuples are sent on that particular stream.
A more detailed explanation of some menu items is available in the Menu Command Reference section of this manual.
This version of the demo supports the following features of STREAM:
The remainder of the documentation describes these features in greater detail.
The following features are currently implemented in our system and will be added to the demo shortly: